The different terms used when describing lime building can be confusing. Some terms are often used interchangeably, but in this article, I’ll describe what exactly the differences are between lime mortar, lime plaster and lime render. So at a quick glance, what do these terms mean?
As a general rule, lime mortar is a lime-based material that is used for pointing, repointing old lime and bedding for new masonry, bricks and stone. Lime plaster is a lime-based material used to plaster walls and ceilings internally. Lime skim coats are also a type of lime plaster. Lime render is a lime-based material used to cover external walls to either protect them or improve the aesthetic of the wall. Lime plaster and renders can, in some cases, be the same exact material, the only difference being plastering is internal work and rendering is external work.
Now we know what these different materials are, let’s go into more detail about each type, their different characteristics and how to make them.
What Are Lime Mortars?
Lime mortars refer to a group of materials used for lime pointing and general building work. There are 3 different types of lime that can be used to make mortars. Lime putty, Hydraulic lime and Hydrated lime. Hydrated lime is commonly found at builders’ merchants, but its generally seen as an inferior product when compared to putty or hydraulic lime. Generally speaking, hydrated lime is only used with portland cement-based mortars as a plasticiser. They should not be used to make lime mortars. Lime mortars are usually mixed at a ratio of 1 part lime to 3 parts sand.
Lime putty is made by mixing quicklime (also known as lump lime) and water. When mixing quicklime with water, a chemical reaction occurs. This produces lots of heat, and afterwards, the resulting putty is normally matured for at least a month. Lime putty can sometimes be matured for years, which improves its quality. The putty, which looks like a very thick double cream, can then be mixed with an aggregate to create a lime mortar, to be used for pointing or new lime building work. Lime putty mortars set by absorbing carbon dioxide out of the air, they do not set with water like cement or hydraulic lime.

Hydraulic lime is usually sold as a powder. It is a lime that has varying amounts of clay impurities which help it set when water is added. There are 3 main strengths of hydraulic lime. Feebly hydraulic lime (NHL 2), moderately hydraulic lime (NHL 3.5) and eminently hydraulic lime (NHL 5). The higher the number, the more clay impurities the lime has, creating a faster set and a harder mortar. Hydraulic limes can be mixed with aggregate to create a lime mortar in the same way lime putty is used. Unlike lime putty mortars, hydraulic limes set quickly when they come into contact with water. They do have a secondary set where they will absorb some carbon dioxide, but this is fairly minor.
Related article: Are Lime Building Materials Environmentally Friendly?
What Are Lime Plasters?
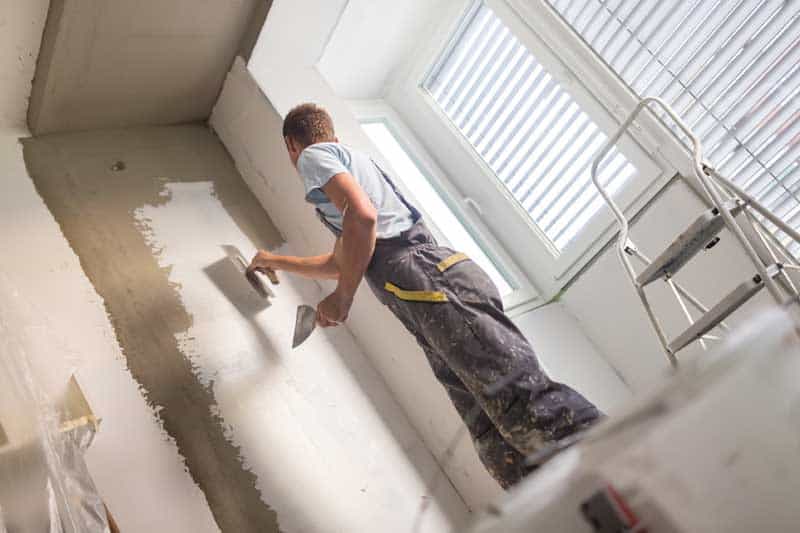
Lime plasters are a group of materials used to plaster walls and ceilings inside a house. Lime putty will work best for making plasters, especially for fine finish coats. Because lime plasters are often made using lime putty, they set by slowly absorbing carbon out of the air. If you are plastering onto a wall that is always damp or wet, the putty-based plaster may never set. It’s only in these extreme conditions that hydraulic lime plaster should be used. Even then, an NHL 2 should be the strongest lime used internally. The use of hydraulic lime will help the plaster set via a reaction with water, and because we are only using feebly hydraulic lime, the finished plaster will still be breathable. Wherever possible, it’s best to use a lime putty-based plaster.
For the best possible finish, lime plasters should be applied in 3 coats. The first coat often called a scratch coat or base coat may sometimes have fibres added. Fibres such as horse or goat hair help give the plaster more tensile strength and help reduce cracking. Adding fibres isn’t always necessary though and plaster can be made using a ratio of 1 part lime to 2.5 parts sharp-washed sand. This first coat will have the coarsest sand and as we progress finer sands will be used. If you are unsure what sharp-washed sand is, click here to find out. Once the base coat has been applied it is then scratched up to create a good mechanical key for the next coat.
Related article: Why Should You Consider Using Lime Plaster or Render?
Once the first coat has thoroughly dried, a second can be applied. This coat should be around 1:2.5 lime to sand. The second coat is usually slightly thicker than the first and should be used to get the wall perfectly straight and ready for the skim coat. The skim coat adds the finishing touch, it should be a 1:1 or 1:2 of fine lime putty to fine sand. The fineness of the sand and the amount of lime will determine how smooth or textured the final coat is.
Lime plastering doesn’t have to be applied in 3 coats. Lime plaster can be applied in as little as 1 coat, although the surface will most likely be more uneven and textured. The gold standard for lime plastering is always 3 coat work, however the best alternative if you’re looking to save some money would be 2 coat work. 2 coat work will consist of a coarse base coat which will be followed up by the skim coat.
What Are Lime Renders?
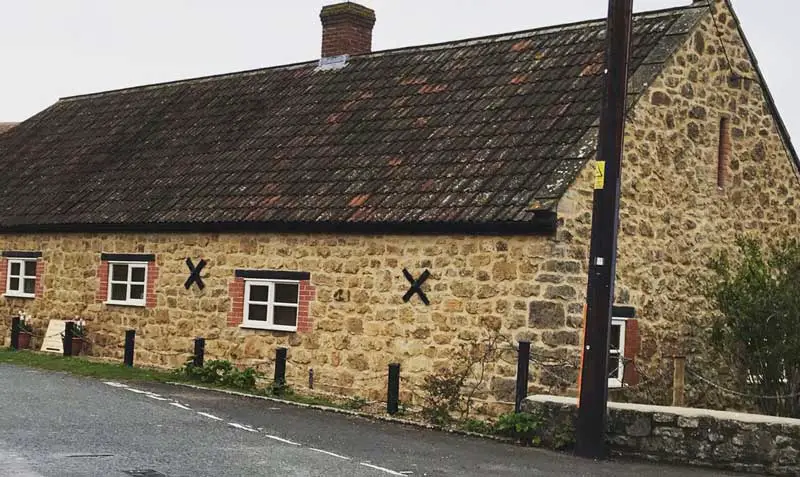
Lime renders, otherwise known as ‘external renders’ are a group of materials used to render the outside of buildings. Lime renders and plasters are very similar, and can sometimes be the exact same material. The difference between them is that lime plaster is used for internal works, and lime render is used for external works.
Lime renders can help protect a building against harsh and exposed conditions. Usually, the rougher the finish of the lime render, the better the weatherproofing quality. Lime renders are often made with lime putty and coarse sharp washed sand, using finer sand on the final coat. Just like lime plastering, more coats usually denotes a higher quality of work, with 3 coats being the best. Lime renders should be made with similar lime-to-sand proportions as lime plaster.
In places which are constantly damp or extremely exposed, hydraulic lime can be used to make lime render. Hydraulic lime helps the render to set by reacting with water, generally, you should opt for the weakest possible hydraulic lime and if possible, just use lime putty. Lime putty and weaker hydraulic limes such as NHL 2 are highly breathable, protecting the building from water ingress and damage. If you have issues with dampness, it’s important to use the most breathable render possible. Using portland cement renders in these situations will likely cause an extensive amount of damage.
