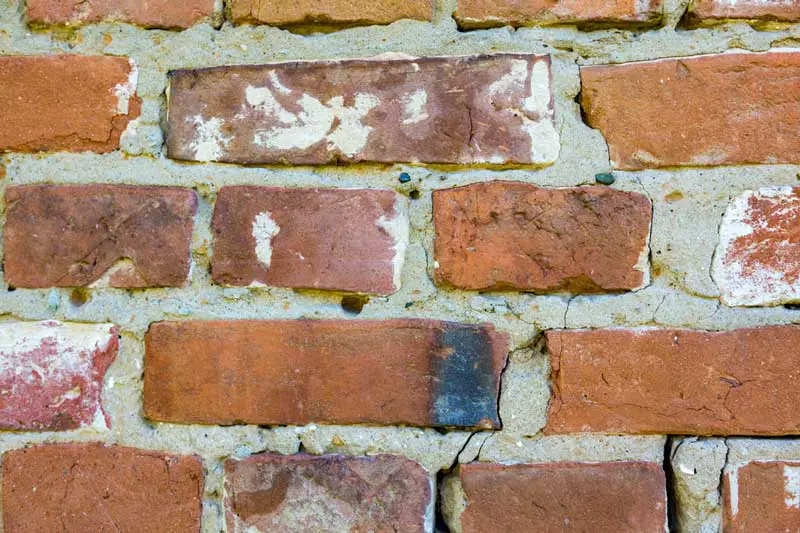
It can be highly frustrating to see your brand-new lime mortar beginning to crack after lots of hard work and effort to get it right. So what are the main reasons that will cause lime mortar to crack, and how do you stop it from cracking?
The most common causes of fresh lime mortar cracking are drying out too quickly, causing poor carbonation and excessive shrinkage. Several different reasons can cause the mortar to dry too soon. One of the simplest ways to combat this is to mist spray the mortar with water if it seems to be drying out and cracking. Covering the mortar with a damp hessian sheet on hot days will help stop it from drying out too fast.
You may have been controlling the moisture well, but your lime mortar is cracking anyway. If this is the case, I’ll detail the other factors that can cause lime mortar to crack below.
The Importance of Moisture Control
Many people refer to the curing process of lime as “drying out”. This isn’t true; drying out of the mortar will not necessarily help it gain strength. Lime putty-based mortars harden by carbonation (absorbing carbon dioxide out of the air), which must occur in the presence of water. That is why it’s essential to control the ‘drying’ out of the mortar to allow proper carbonation.
If mortars dry out in a day or even a few hours, little to no carbonation would have occurred. A lime mortar that dries out too quickly will be weak, cracked and likely crumbly. Depending on the weather, lime mortars may need to have a moist sheet of hessian hung in front of them to provide shade and protection from the wind, which can also cause mortar to dry too quickly.
For the best possible results, fresh lime mortar should be kept continually moist for around one week. This will depend on the circumstance of the particular project but is an excellent general guideline. The most critical time will be the first 2-3 days; the mortar must be kept shaded from strong sun and drying winds, often achieved using a damp hessian sheet. It’s best to dampen the mortar with mist rather than a brush or hose, as the fine mist can pick up carbon dioxide to help the carbonation process. If you don’t have access to a mister, it won’t be the end of the world to apply water another way.
Related article: How Long Will Lime Mortar Pointing Last?
The Mortar Was Too Wet When it Was Applied
Generally speaking, the wetter the mortar, plaster or render is, the more shrinkage will occur. Lime is thixotropic, the property of some fluids or gels that become thick if left still over some time. Once shaken, mixed or otherwise agitated, they take a fixed amount of time to become less thick and runnier. So why does this matter?
When purchasing pre-mixed lime putty-based mortars, they have often become thick and stiff in their container. People often immediately add water when they see this and mix the mortar. Then, when the mortar slowly becomes too wet, they wonder what has happened. The best practice is to always mix pre-mixed lime mortars for a reasonable time before adding any water. Keep mixing until the thixotropic process has stopped. You can tell because the mortar will stop getting less thick and will stay the same. Only at this point can you add some water.
If you accidentally make your lime mortar too wet, an excellent way to remove some of the water is to lay it out over a clean spot board in a sunny spot. The mortar may be good enough to use within an hour or so. Generally speaking, the thicker the lime mortar you use, the less shrinkage will occur.
The Mortar Has an Inappropriate Aggregate Size Compared to The Joint Size
In most cases, a good rule is that the largest aggregate size is no smaller than 1/3 of the joint size. So, for example, a joint 12mm wide would require a 4mm well-graded aggregate. If finer sand is used, it will have much more potential for shrinking, and there is little you can do about this other than to use a mortar with a better aggregate for the joint size. Click here for more information on well-graded aggregates.
Sands that are not well-graded will also cause shrinkage and a weak mortar. You can perform a quick visual inspection of the sand to see if it is well-graded. Grab half a handful of sand and check to see if there’s a good even proportion of large, medium and small particles. Whilst you are looking, check to see if the sand appears angular and not rounded. An angular ‘sharp’ sand will create the best lime mortars, and ‘soft’ rounded sands will produce a poorer lime mortar.
Make sure your check your sand has all of these characteristics before using it to make a lime mortar. A lime mortar bought pre-mixed should have well-graded and sharp sand in it; make sure the overall coarseness is correct for your joint size.
The Mortar is Too Deep or Not Properly Compacted Into The Wall
When repointing with lime mortar, it’s essential to note how deep the joint is. If the joint is over 25mm deep, it will need to be built up more slowly. For example, you have a joint that’s 50mm deep that needs pointing. You can point the first 25mm; you then must wait probably 1-3 days to allow for carbonation or any shrinkage. Then, you can fill the rest of the joint, pressing the mortar in well.
Another good practice with lime is to ‘beat’ it back with a churn brush or stiff-bristled brush. To some extent, lime will always shrink, so it’s pretty normal to have the odd small crack. To get over this issue, it’s common to beat back the mortar.
When the mortar is fingernail hard (or so you can make an indent with your nail), beat the joints with a churn brush. This will help compact the mortar and fill any cracks that may have appeared. This process also helps to beautify the mortar, bringing out aggregate and improving the aesthetic.
The Background Has Too Much Suction or Loose Material Within
When raking out joints before pointing, every piece of loose material must be removed. Loose material will not provide the lime mortar with a good mechanical key (it won’t be able to ‘hold’ onto it) and must be removed. On exterior works, it’s common to wash the joints out with a hosepipe. This does two things, it removes the loose material and dust and sufficiently wets the area down for pointing.
High-suction backgrounds, such as brick and cob, will remove the water from lime mortars before they have a chance to carbonate. Giving the wall a good soak about an hour before the repointing begins is best practice. When applying the lime mortar, ensure the area you are pointing is still slightly damp, especially if working in hot or windy weather.
