Lime plaster is one of the oldest building materials used in construction, and its use dates back thousands of years. It’s a versatile material that has many benefits, such as being breathable and flexible, making it ideal for interior and exterior walls. But how many coats of lime plaster are necessary for optimal results?
Generally, three-coat lime plasterwork is of the highest standard. Three coats of lime plaster will create the straightest, smoothest, strongest, and most sanitary surface for walls and ceilings. Two-coat work can be used in areas of less importance. One coat lime plasterwork is of the lowest quality but will create a low-cost finish.
In this article, we will discuss different types of coats for lime plastering and explain why three coats of lime plaster are best. So read on to learn more about the art of lime plastering!
What is Lime Plaster?
Lime plaster is a traditional building material that has been used for centuries to create strong, durable and attractive walls. It’s made from calcium carbonate-containing stone, like limestone and chalk. These stones are burned in a kiln to form a reactive powder called quicklime.
Quicklime is then mixed with water in a process called slaking, forming a thick white material called fat lime or lime putty. This lime is mixed with various sands, aggregates and sometimes fibres to create lime plaster. Lime plaster can be used on interior and exterior walls as it’s breathable and flexible.
Fat lime plasters set via carbonation. This is the slow process of the plaster absorbing carbon dioxide (CO2) out of the air to harden. On average, lime plaster will take around a day per 1mm of thickness to set. Good lime plaster work can therefore take over a month to fully cure. Something you must be aware of before starting your project.
Related article: Fat Lime in Construction: Uses, Advantages, and Limitations
Benefits of Using Lime Plaster
Using lime plaster is a great way to give any structure a beautiful, professional finish while also providing protection from moisture and regulating temperature and humidity. Lime plaster is an incredibly versatile material which can be used for both interior and exterior applications. It has been around for centuries due to its durability and strength. Its breathable, flexible, and fire-retardant properties make it especially attractive for modern homes and businesses.
The beauty of using lime plaster is that it will last for years without needing any maintenance once applied correctly. Plus, its breathability helps regulate humidity levels inside your home or business, making them more comfortable year-round. So if you’re looking for an attractive finish that requires minimal upkeep and provides added protection against the elements, consider using lime plaster on your next project!
Different Types of Coats for Lime Plastering
Lime plastering is a popular choice for both interior and exterior applications due to its durability and strength. Two or three coats of lime plaster may be necessary to achieve the desired results. The first coat is typically a scratch coat, a coarse material applied to the wall or ceiling. The second coat is a browning or floating coat and is used to level out the wall. Finally, a fine third coat is applied, giving the plaster its beautiful finish.
No matter how many coats are used, applying lime plaster correctly will give your structure an attractive finish that lasts for years without needing any maintenance. Additionally, its breathability helps to regulate humidity levels inside your home or business, making them more comfortable year-round.
3 Coat Lime Plaster Work (The Gold Standard)
Three-coat lime plaster is the best way to ensure a beautiful and durable finish on your walls. With its thick layer of coverage, three coats of lime plaster protect against water damage and cracking. Using three coats allows good plasterers to get the best possible finish with lime plaster. Whether you go for a rustic look or a more modern dead straight look, three coats are the way to go!
Applying three coats of lime plaster may take longer, but it’s definitely worth it! Not only will you have a beautiful finish, but you’ll also have superior durability compared to single-coat or two-coat applications. So if you’re looking for a high-quality finish that looks great and can withstand wear and tear, three-coat lime plaster is the way to go.
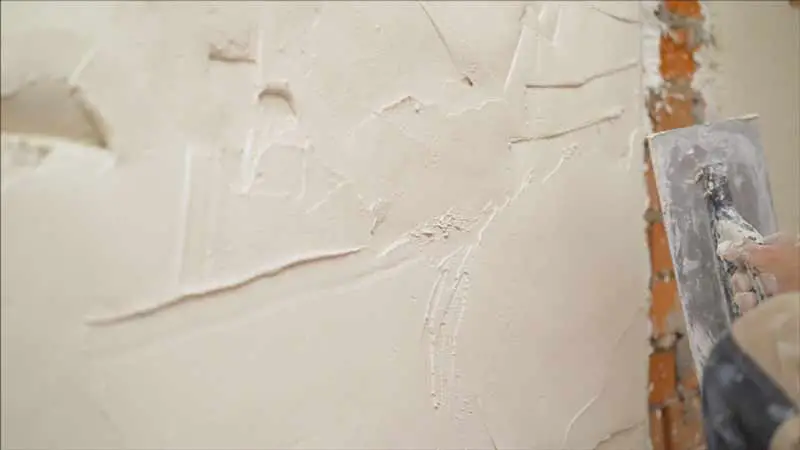
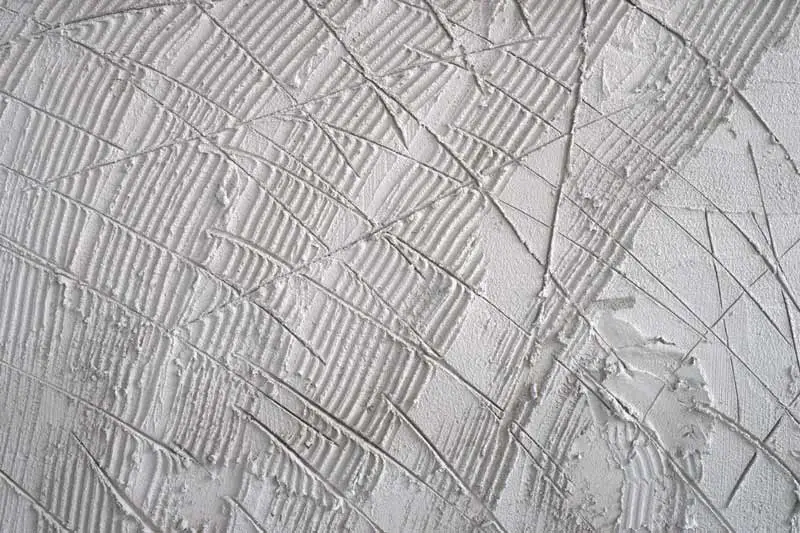
Scratch Coat (The First Coat)
A scratch coat is an important part of any lime plastering project. It is the first coat applied and helps to create a strong base for subsequent coats. Scratch coats can be applied to bare masonry and laths and are made with coarse aggregates to give subsequent coats a better mechanical key. They are usually 6-16mm thick, depending on the project’s circumstances.
In some cases, fibres or hairs are added to a scratch coat. This helps improve tensile strength and is especially useful when applying the plaster to laths. After the scratch coat has been applied, it is heavily scratched with tools so that the next coat sticks well, hence the name!
Float Coat / Brown Coat (The Second Coat)
Float coats are an important step of any lime plastering project. A float coat is the second coat applied after the scratch coat and helps level the wall. This is the most important coat to get right if you are going for a dead-straight finish. Before applying a float coat, you must wait for the scratch coat to cure fully.
A float coat should be applied as evenly as possible with a steel trowel to avoid creating dips or ridges on the surface. The float coat should be between 13-16mm thick, thicker than the scratch coat but still thin enough to prevent cracking when dry. The float coat is then lightly scratched to form a key for the final or skim coat.
Finish Coat / Skim Coat (The Third Coat)
Finish or skim coats are the last step in a lime plastering project and can make your interior walls look beautiful. These coats are usually much thinner than the previous two, between 3 and 5mm thick on average.
There are many different types of lime finish plasters. From ultra-fine skim plasters for a smooth finish to fine plasters that can provide a more grainy and textured finish. When selecting your finish, the world is your oyster, as you can make almost a limitless amount of different finishes with lime.
Related article: How Soon Can You Paint Over Lime Plaster?
2 Coat Lime Plaster Work
Two-coat lime plaster work is usually reserved for secondary areas or areas of the house which are not often seen. This helps to save money as it is a much quicker and less expensive process. Two-coat lime plaster work is inferior to three-coat work in durability and beauty.
Two-coat work is usually made from an initial scratch coat around 15mm thick. This will need to be troweled up as level as possible, as there is no float coat to do this. After the scratch coat has cured, the final or skim coat is applied the same way as for the three-coat work.
Two-coat lime plaster will still produce a fantastic finish. It will never quite match the standard that three-coat plaster provides.
1 Coat Lime Plaster Work
A single coat of lime plaster is perfect for a quick, easy and cost-effective finish. It’s ideal for interior walls that don’t need to be highly decorated or protected from the elements. A single coat can give you an attractive and durable finish without breaking the bank.
For one coat lime plaster work, you will need very high-quality lime plaster. Make sure you use trusted suppliers. Usually, a medium-coarse plaster is best and can be applied up to 18mm thick. This plaster is usually finished using various tools such as sponge, carpet and felt floats. While you’ll unlikely get a super smooth finish with one coat work, they can still produce a soft and delightful finish.
Consider using a single coat of lime plaster for a beautiful, effortless finish on your interior walls! It’s easy to apply, cost-effective, and durable – all in one simple step!
